In any given mission, a random selection of Objectives are assigned. Most objectives must be completed, though a few can be failed; failing an objective reduces XP and influence (stars) gained accordingly.
As with Stratagem Beacons, an active or threatened objective tends to draw a great deal of attention from enemy patrols. Whilst the degree varies from objective to objective, caution should be exercised. Prepare defenses before activating Launchpads or Geological Surveys, and be ready to fend off incoming enemies!
Locating Objectives
Some objective types may require you to search an area to locate them, with the size of the area varying from mission to mission, though the Humblebee UAV drone can reveal the location of objectives when upgraded.
There are two other ways to locate hidden objectives without the Humblebee UAV:
- Use your map to locate a group of patrols. If you see a clump of red dots, there is a good chance there's an objective nearby. This requires some degree of stealth on the part of the Helldiver attempting it, as triggering an alarm will quickly fill the map with more red dots than a Predator rave party.
- Some terrain elements (specific rock formations, volcanoes) tend to spawn in predictable configurations with specific objectives. For example, large clusters of Bug Nests will often be hidden near a long, vertical mountain ridge.
Objective Types
Exterminate
| The most simple objective available; kill a specific number of enemies. The quantity of enemies that must be killed depends on the threat level of the planet, ranging from as low as 40 or 50 to as high as 200. Numbers are usually double this for Retaliatory Strikes, in which this is the only objective (besides Extract). |

During a Retaliatory Strike, a large kill counter (with progress bar) will appear at the top of the screen.

Destroy
Each faction has its own spin on this otherwise-simple task:
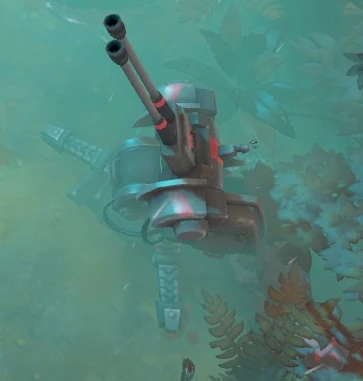
| Destroy Cyborg AA Guns | |
| For the Cyborgs, you must destroy three AA Guns that are protected by a jamming field. This requires using anti-tank weapons, or you can disable the generator; this will temporarily shut down the jamming field and allow the use of stratagems. | |
| Destroy Bug Nests | |
| For the Bugs, you must destroy between two and five Nests. Whilst the Nests are not heavily guarded, activity near them is sure to draw attention from scouts; be prepared to deal with them quickly before they can summon bigger, angrier bugs. | |
| Destroy Illuminate Beacons | |
| For the Illuminate, you must destroy a pair of shielded Beacons. The shield is strong enough to withstand the blast of a Hellbomb, so the shields must be disabled first; this is accomplished by shooting the shield with any conventional weapon. | |
Nests and Beacons may require searching an area; Beacons emit a distinct electrical hum that will help you easily identify when you are close to them. AA Guns never require searching.
Helldivers will be provided with unlimited uses of the NUX-223 Hellbomb Special stratagem until all 'Destroy' objectives in a mission have been completed. If you appreciate the Hellbomb for its other uses (such as luring enemies to it, creating chokepoints or crushing heavy enemy units), consider this when picking the order in which to complete objectives.
Alternatives to the Hellbomb
'Destroy' objectives can also be eliminated using most anti-tank weapons and stratagems, such as (but not limited to):
Anti-tank Supply stratagems:
Anti-tank rounds fired by:
|
Anti-tank capable Offensive stratagems:
|
Note that not all weapons and stratagems are effective against all targets, particularly if the area of effect for their Anti-Tank or Explosive element is especially small. While the MLS-4X Commando can theoretically destroy objectives, its missiles require precise angle and distance as they do not home in on objectives; to make things worse, any nearby enemies will attract the missiles instead.
Also note that the only attack stratagems capable of destroying a shielded Illuminate Beacon are the Thunderer Barrage and Shredder Missile Strike; the Missile Barrage's spread is random and it will occasionally manage it, but all other approaches require the Beacon's shield be disabled first.
Lone Cyborg AA Guns can also be found on most missions in Cyborg territory, and will project a small jamming field of their own. As the single AA Guns are not powered by generators that can be disabled, their radar jamming is only shut down when they are destroyed. For this reason, non-objective Cyborg AA Guns are not vulnerable to the NUX-223 Hellbomb or any of the Offensive anti-tank stratagems: none of those can be used in their vicinity. Helldiver-carried anti-tank weapons remain a viable option.

A Cyborg AA Gun
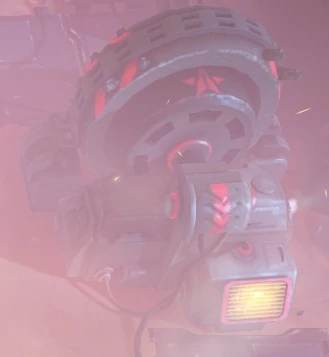
A Cyborg Generator

A Bug Nest

An Illuminate Beacon


Retrieve
Simple, in theory; 'Retrieve' objectives task you with recovering an item and bringing it to the randomly-placed bunker.
| Black Box | Power Core | Bunker |
Whilst carrying the item in question, a Helldiver can only use one-handed weapons such as pistols (like the P‑2 Peacemaker or LAS-16 Tanto), SMGs (like the SMG-45 Defender) and the sawn-off DBS-2 Double Freedom.
The carrier cannot get into vehicles (nor store the objective in a free seat) or use stratagem beacons without dropping the box. Going prone or engaging the LIFT-850 Jump Pack will drop the objective where the Helldiver was standing. This can also be used to drop a Retrieve objective off at the bunker instead of using the Interact command ('X' on the PlayStation).
Retrieve objectives can be failed by dropping the item into an inaccessible area, such as a bottomless pit, lava pool, etc.
The above carrying mechanics also apply to the artillery shells players are required to locate and load to complete the Artillery objective.
Both Black Boxes and Power Cores may sometimes need to be searched for. Power Cores are typically easier to locate, as they are always surrounded by the 'structure' shown in the image below, while lost Black Boxes are typically found near the corpse of an unfortunate Super Earth Regular Army soldier.
A Black Box and its unfortunate previous carrier
An Illuminate Power Core, ripe for the taking


Escort
There are two variations on the Escort objective: Survivors, and the Resource Convoy;
| Escort Survivors | |
| Found at a crashed shuttle site, always in groups of four, they must be brought to the randomly-placed bunker. Enemies will ignore Survivors until a Helldiver interacts with them. | |
| The objective is failed if all four members of a Survivor group are killed. Just a single Survivor needs to make it to the bunker alive; there are no penalties for the first three fatalities. | |
Care should still be taken around Survivors, as they are vulnerable to stray shots, accidental fraggings and similar mishaps. They can be knocked down (and helped up) just like Helldivers, and will eventually bleed out if not attended to.
Whilst Survivors are slow, unarmed, and have only minimal protection, they are oddly immune to most slowing hazards (such as snow or deep water) and can walk through an Illuminate Obelisk's wall. They will even shrug off the effects of the control-reversing of Illusionists and Council Members.
Survivors will automatically die (despawn) if they are off-screen for too long.
There is a bug which can sometimes occur if Survivors are still active off-screen while one or more have already entered the bunker. This is triggered when the Helldivers move too far away past the bunker before the off-screen Survivor manages to get inside.
The bug can lead to Survivors getting stuck outside of the playable area (still showing up on the map), which prevents the mission objective from being completed or failed with no Extraction possible. Therefore, it is good practice to make sure that all Survivors following you end up either safely inside or safely splattered before moving on.
It is sometimes necessary to search for the crash site when escorting Survivors. The fiery plane wreckage emits a crackling sound that can be used to find it, but you must be in the vicinity already. This is much less effective during Capital Defense missions, which take place in a ruined, smoldering cityscape that is littered with burning buildings.
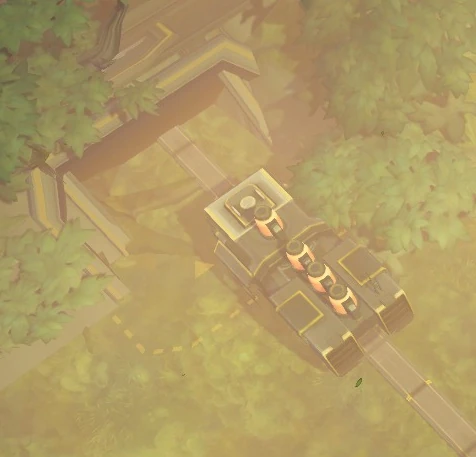
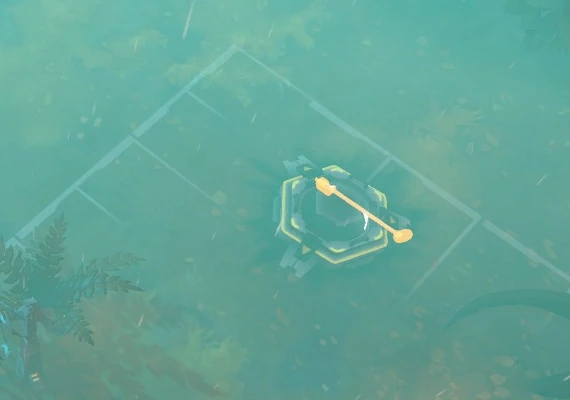
| Escort Resource Convoy | |
| Enemies will ignore a Convoy until it is activated by a Helldiver. It then moves slowly along a fixed route, indicated as a grey line on the map and a visible track on the terrain. | |
Once the Convoy is parked safely within its bunker, the objective is complete; if it is destroyed, the objective is failed. Even if the Convoy is damaged, XP is not deducted for 'partial' completion. The Convoy will halt if an enemy or Helldiver comes into extremely close proximity. It can be destroyed by friendly fire.
Hellpods cannot be dropped on the Convoy's rails. Any stratagem that uses the Hellpod as a delivery system can be expected to land some distance away from the rails, even when the call-in beacon is thrown directly onto the rails. On snow-covered or swamp-ridden planets, the Convoy's rails count as normal terrain. Helldivers without All Terrain Boots can exploit this to improve their mobility.
Four survivors
Resource Convoy at starting Depot
Resource Convoy and ending Bunker


Deploy
There are several variants on this type of objective:
| Activate SAM Site | |
| Deploy and activate between one and three surface-to-air missile launcher turrets. Each site has two input stages; the first stage is the same for every SAM site (up-down-down-up), the second stage is randomized and fairly long. Once all the sites are activated, the objective is complete. | |
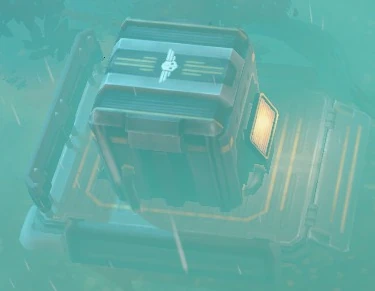
| Activate Truth Transmitter | |
| Usually seen in Cyborg territory, these individual sites have four stages; hold, input, hold, input. The input stages are always the same. Second: up-up-down-left-left-up-up-right-up. Fourth: down-down-up-down-down-down-left-down-up-down-down. | |
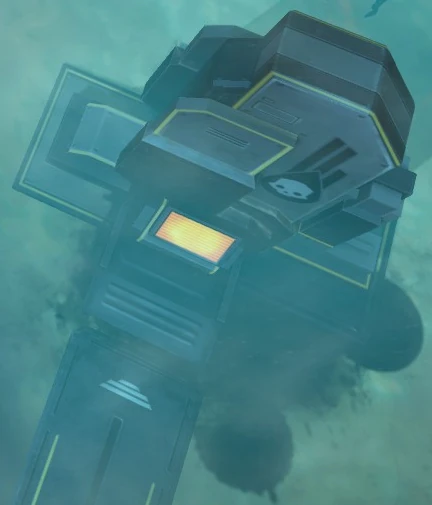
| Activate Oil Extractor | |
| Similar to the Truth Transmitter, but almost always found in Bug territory and occasionally in pairs. Otherwise, they have the same hold-input-hold-input activation as Truth Transmitters, with random input stages. | |
| Repair and Fire Artillery | |
| Repair and fire an artillery piece. Four stages; input, hold, load, input. The input phases are random each time. For the 'load' stage, three shells must be recovered from the environment and placed near the loading conveyor at the rear of the gun. Completing the second input stage ("Aim Artillery") will display the location of the artillery shells on the map. Once the fourth stage (a long, randomized input) is complete, the gun will fire and the objective will be marked as completed. | |
| Note that the mechanics for carrying the Black Box or Power Core Retrieval objectives apply to Helldivers lugging around artillery shells as well. This includes the potential for failing the objective, if they happen to fall off a cliff while holding a shell. | |
| Perform Geological Survey | |
| One of the harder objectives as it requires guarding the objective whilst also interacting with a panel, Helldivers must deploy a drilling rig that will run a survey. This is a hold-input-hold-input-input sequence; the first input is short and random starting with down-down-down, the second input phase is long and random, and the last input stage being the same for every Survey (right-down-up-left).
A Geological Survey drilling rig can be destroyed by enemies (or friendly fire) after the objective is complete, but this will not mark the objective as failed. The survey rig can even provide a useful distraction whilst the Helldiver team moves on to their next objective, though enemy scouts will continue to be alerted by it as long as it is in the line of sight of a Helldiver. | |
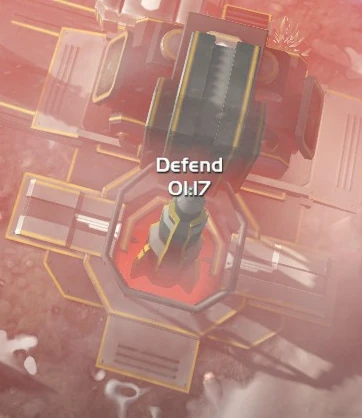
| Activate and Defend Launchpad | |
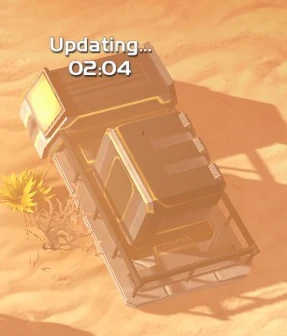
| A simple defend/holdout; interact with a panel and defend the missile for one minute and thirty seconds. If the missile is destroyed it will explode violently, killing everything in a small radius around it. Often appears surrounded by water on swamp planets, which will make defending this objective much harder. | |
Geological Surveys and Missile Launchpads can be failed if the survey rig or missile are destroyed, docking XP accordingly. Missile Launchpads will self-destruct if Helldivers run too far from them, but Geological Surveys will not. All other Deploy objectives (other than the Artillery) will revert to their base state if left unattended for too long, but otherwise cannot be failed.
A semi-deployed SAM site
A packed Truth Transmitter
An idle and powered-down Oil Extractor
An artillery piece in need of repairs, operation, and ammo
One of the missing shells
A completed Geological Survey
A launchpad, counting down


Defuse
| Helldivers must use the ME-1 'Sniffer' Metal Detector to find between three and five unexploded mortar shells within (or just outside of) the marked area, then interact and defuse with each shell. |
Using the wrong input will cause the shell to explode; this is instantly lethal to any Helldiver who is not wearing an SH-20 Shield Generator Pack or protected by the Displacement Field Perk, and can kill any nearby Helldivers (or enemies) too.
Undetonated explosives cannot be set off by gunfire, grenades, or other explosives; even a Shredder Missile Strike won't set them off.
The area that must be searched (and number of explosives) increases with difficulty. Even if none of the explosives are disarmed successfully, as long as they have been disposed of, the objective is a success; no XP is docked if any have accidentally been set off.
An area in need of searching, with an ME-1 ready for use
An undetonated shell

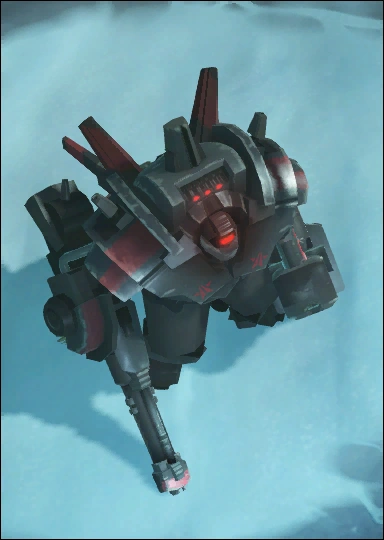
Assassinate
| Helldivers must seek out and kill a Warlord, Council Member, or Brood Commander, by any means necessary. Council Members and Brood Commanders can be killed with small arms, but the Warlord will require more serious firepower, such as high-power precision or plasma weapons. Anti-tank weapons and stratagems are the safest option for taking it out. |
An achievement/trophy can be earned if the player kills either an Illuminate Council Member or a Bug Brood Commander by running them over with the M5 APC or M5-32 HAV; using the TD-110 Bastion will not work.
Assassinate targets will roam around like a scout patrol, but their objective icon follows them wherever they go.
A Warlord
A Council Member
A Brood Commander


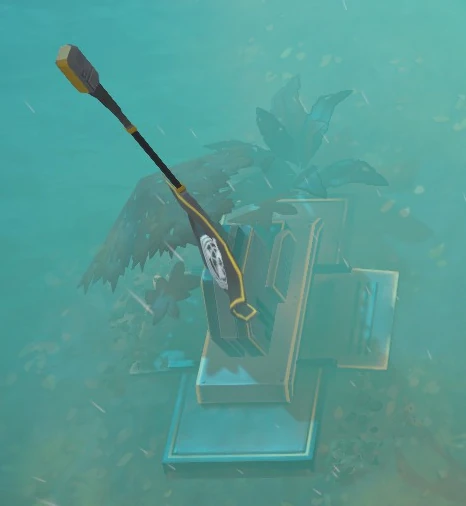
Capture Area
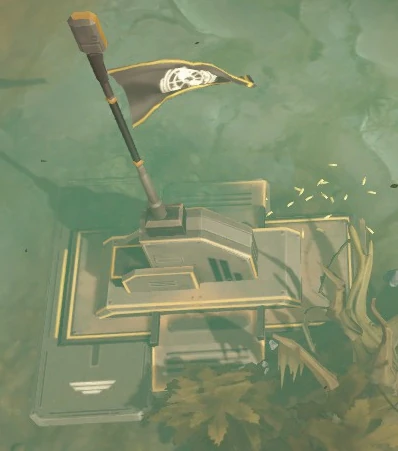
| The Helldiver team must secure the area around a flag post and hold out until it is captured. Whilst capturing the flag, a bar will appear to show progress, and the flag will raise (or lower) accordingly; Helldivers must stay within a set area or the capture process will quickly reverse. This greatly restricts the Helldiver's freedom of movement. |
In solo play, dying will drain most of the capture bar until the auto-reinforce Hellpod has touched down.
When enemies are within the capture area, the capture rate is greatly slowed (but not completely halted) and the text over the flag will change to 'Clear Area' until all enemies too close to the objective have been neutralized. Capturing these objectives can therefore turn into a grueling ordeal if the alarm is raised and enemy troops start to deploy in large numbers. Keeping patrols from spotting you while you are capturing the objective is advised, especially on higher difficulties. Attempting a capture objective while being tailed by a horde of alerted enemies is not.
On swamp worlds, these flags have a high chance of showing up surrounded by areas of water which decreases the Helldiver's mobility unless they happen to be equipped with a LIFT-850 or the All-Terrain Boots.
An untouched Capture flag
This land now belongs to Super Earth!
Extract
| The final objective of any mission, Helldivers must complete a short input sequence (always six button presses, randomized) and then hold out for one minute and thirty seconds until the shuttle arrives. |
During this time, enemy patrols will swarm towards the extraction beacon in force from across the entire area of operations; scouts should be swiftly eliminated to prevent stronger enemy forces from being called in and potentially jeopardizing the extraction.
Once the shuttle lands, the team has approximately twenty seconds to get aboard before it takes off again. Whilst Extraction cannot be failed, XP and Galactic Campaign influence are reduced if Helldivers are left behind, so it is important to make sure everyone makes it on board.
The only exceptions to the 90-second Extraction waiting time are:
