User-100165523 (talk | contribs) No edit summary |
User-100165523 (talk | contribs) |
||
| (20 intermediate revisions by 3 users not shown) | |||
| Line 2: | Line 2: | ||
This page is a work in progress and will be updated in the near future. |
This page is a work in progress and will be updated in the near future. |
||
| + | ==Work in Progress== |
||
| ⚫ | |||
To be expanded: |
To be expanded: |
||
| Line 9: | Line 9: | ||
* Advanced tactics/techniques such as a recommend and the most useful loadouts, tricks and more... |
* Advanced tactics/techniques such as a recommend and the most useful loadouts, tricks and more... |
||
| − | * All hand-crafted arenas. (+ screenshots) |
+ | *<s> All hand-crafted arenas. (+ screenshots)</s> |
** Effects of the various terrain types on certain maps (i.e. the "small cyborg square" never features any terrain hazard, etc.) |
** Effects of the various terrain types on certain maps (i.e. the "small cyborg square" never features any terrain hazard, etc.) |
||
*** And all bugs, glitches, and exploits assigned to them. |
*** And all bugs, glitches, and exploits assigned to them. |
||
==Retaliatory Strike== |
==Retaliatory Strike== |
||
| − | Retaliatory Strike missions are a part of a free content update '''[[Democracy Strikes Back]]''' released on 26th October 2015. These missions require Helldivers to drop into a hazardous, arena-like area to exterminate as many of the enemies of democracy as possible before being allowed to extract. |
+ | Retaliatory Strike missions are a part of a free content update '''[[Democracy Strikes Back]]''' released on [[Liberty Day|26th October]] 2015. These missions require Helldivers to drop into a hazardous, arena-like area to exterminate as many of the enemies of democracy as possible before being allowed to extract. |
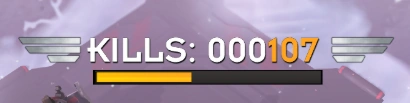
During a Retaliatory Strike, a large kill counter (with progress bar) will appear at the top of the screen. |
During a Retaliatory Strike, a large kill counter (with progress bar) will appear at the top of the screen. |
||
[[File:kill_counter_rs.png|320px|left]] |
[[File:kill_counter_rs.png|320px|left]] |
||
| + | <div style="clear:both;"></div> |
||
| ⚫ | |||
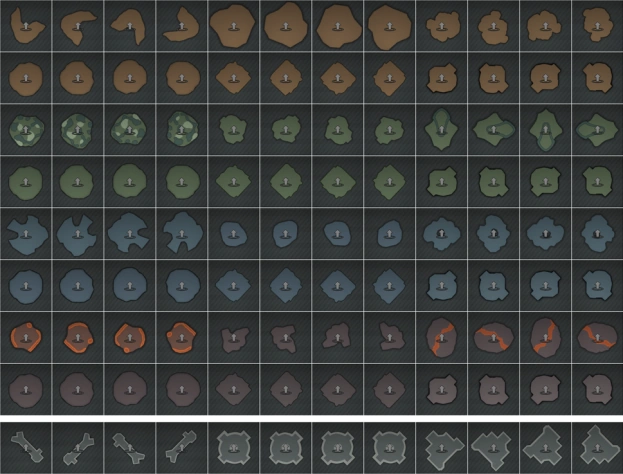
| + | There are 108 handcrafted arenas in total. Going left to right, [[Bugs]], [[Cyborgs]], and [[The_Illuminate|Illuminates]] previews appear in columns of four. [[Planets#City|City Event]] arenas appear as a row separately at the bottom: |
||
| + | [[File:rs_maps.png|400px|left]] |
||
| + | <div style="clear:both;"></div> |
||
| + | ==Difficulty Kills Required Table== |
||
| − | |||
| + | Retaliatory Strikes can appear from [[Planets#Overview|Medium]] up to the [[Planets#Overview|The Inner Circle of Hell]] difficulty as one of the tree missions. |
||
| − | |||
| − | |||
| − | |||
| − | ==Difficulty== |
||
| − | Retaliatory Strikes are available from [[Planets#Overview|Medium]] up to the [[Planets#Overview|Helldive]] Difficulty, for each faction. High in-game knowledge and skills are required from the Helldivers to successfully complete the mission. |
||
| − | |||
{| class=wikitable |
{| class=wikitable |
||
|- |
|- |
||
| − | ! rowspan="2" | Difficulty !! rowspan="2" style="text-align:left" | Description !! colspan="3" | Enemies to |
+ | ! rowspan="2" | Difficulty !! rowspan="2" style="text-align:left" | Description !! colspan="3" | Enemies to kill |
|- |
|- |
||
! style="width:80px" | Bug !! style="width:80px" | Cyborg !! style="width:80px" | Illuminate |
! style="width:80px" | Bug !! style="width:80px" | Cyborg !! style="width:80px" | Illuminate |
||
| Line 50: | Line 50: | ||
|- |
|- |
||
| style="text-align:center" | '''12''' || '''Helldive''' || style="text-align:center" | 400 || style="text-align:center" | 400 || style="text-align:center" | 400 |
| style="text-align:center" | '''12''' || '''Helldive''' || style="text-align:center" | 400 || style="text-align:center" | 400 || style="text-align:center" | 400 |
||
| + | |- |
||
| + | | style="text-align:center" | '''13''' || '''An Exercise in Futility''' || style="text-align:center" | 410 || style="text-align:center" | 410 || style="text-align:center" | 410 |
||
| + | |- |
||
| + | | style="text-align:center" | '''14''' || '''The Definition of Insanity''' || style="text-align:center" | ? || style="text-align:center" | ? || style="text-align:center" | ? |
||
| + | |- |
||
| + | | style="text-align:center" | '''15''' || '''The Inner Circle of Hell''' || style="text-align:center" | 450 || style="text-align:center" | 450 || style="text-align:center" | 450 |
||
|- |
|- |
||
|} |
|} |
||
==Retaliatory Strike Hazards== |
==Retaliatory Strike Hazards== |
||
| − | The Retaliatory Strike arenas usually |
+ | The Retaliatory Strike arenas usually do not stand out, but a few of them are extremely dangerous, not only because they are filled with [[enemies]] - Arenas are arranged with hazards such as: |
* '''[[Planets#Planet Environments|Water]]''' |
* '''[[Planets#Planet Environments|Water]]''' |
||
* '''[[Planets#Planet Environments|Snow]]''' |
* '''[[Planets#Planet Environments|Snow]]''' |
||
| Line 61: | Line 67: | ||
==Gameplay Tips== |
==Gameplay Tips== |
||
* The [[AT-47 Anti-Tank Emplacement]] is very effective on the Retaliatory Strike mission-type, especially against [[Cyborgs]] or [[Bugs]], and many players consider this Stratagem to be overly powerful against any enemy race. For new recruits especially, the AT-47 can turn a seemingly impossible endeavour into an easy experience. One or two emplacements defended and/or healed by other players with additional defensive items is a commonly found set-up for RS missions. |
* The [[AT-47 Anti-Tank Emplacement]] is very effective on the Retaliatory Strike mission-type, especially against [[Cyborgs]] or [[Bugs]], and many players consider this Stratagem to be overly powerful against any enemy race. For new recruits especially, the AT-47 can turn a seemingly impossible endeavour into an easy experience. One or two emplacements defended and/or healed by other players with additional defensive items is a commonly found set-up for RS missions. |
||
| + | * Another effective tactic is to set up defenses such as [[Airdropped Anti-Personnel Mines]] or the [[A/AC-6 Tesla Tower]] in the center of the map. If (or rather when) the enemy swarms your position, reposition by skirting around the defenses (or by using a [[LIFT-850 Jump Pack|Jetpack]] to jump over them), escaping the enemy and simultaneously leading them back through the kill zone. |
||
| + | ** The [[Airdropped Anti-Personnel Mines]] or/and [[A/AC-6 Tesla Tower]] is only effective against [[Bugs]] and [[The Illuminate|Illuminates]], bringing this loadout on the higher [[Cyborgs]] Retaliatory Strike missions is not recommended. |
||
| + | * It is recommended to bring the laser weapons instead, you will save one stratagem ([[Resupply]]) slot which will be very helpful to you and your team on the arena. |
||
| + | * Teamwork is especially required on Retaliatory Strike missions. Help your fellow Helldivers and match the loadout to theirs. (If your team is using ammo-hungry weapons and you will need more ammo, then take more resupply even at the cost of your 2 stratagems slots!) |
||
| + | * Retaliatory Strikes are quite small, but it doesn't mean to stay in one place. Movement is the most important part of survivability so keep moving. |
||
==Notes== |
==Notes== |
||
| Line 68: | Line 79: | ||
==Gallery== |
==Gallery== |
||
<gallery> |
<gallery> |
||
| − | File: |
+ | File:Rs kill counter1.png| '''0 enemies eliminated''' |
| − | File: |
+ | File:Rs kill counter2.png| '''57 enemies eliminated''' |
| − | File: |
+ | File:Rs kill counter3.png| '''246 enemies eliminated''' |
| − | File: |
+ | File:Rs kill counter4.png| '''300 enemies eliminated''' |
| − | File: |
+ | File:Rs kill counter5.png| '''376 enemies eliminated''' |
| − | File: |
+ | File:Rs kill counter6.png| '''504 enemies eliminated''' |
</gallery> |
</gallery> |
||
Revision as of 09:29, 23 August 2020
This page is a work in progress and will be updated in the near future.
Work in Progress
To be expanded:
A specific number of enemies required to accomplish the mission for all factions at any difficulty.
- Advanced tactics/techniques such as a recommend and the most useful loadouts, tricks and more...
All hand-crafted arenas. (+ screenshots)- Effects of the various terrain types on certain maps (i.e. the "small cyborg square" never features any terrain hazard, etc.)
- And all bugs, glitches, and exploits assigned to them.
- Effects of the various terrain types on certain maps (i.e. the "small cyborg square" never features any terrain hazard, etc.)
Retaliatory Strike
Retaliatory Strike missions are a part of a free content update Democracy Strikes Back released on 26th October 2015. These missions require Helldivers to drop into a hazardous, arena-like area to exterminate as many of the enemies of democracy as possible before being allowed to extract.
During a Retaliatory Strike, a large kill counter (with progress bar) will appear at the top of the screen.
Retaliatory Strike Arenas
There are 108 handcrafted arenas in total. Going left to right, Bugs, Cyborgs, and Illuminates previews appear in columns of four. City Event arenas appear as a row separately at the bottom:
Difficulty Kills Required Table
Retaliatory Strikes can appear from Medium up to the The Inner Circle of Hell difficulty as one of the tree missions.
| Difficulty | Description | Enemies to kill | ||
|---|---|---|---|---|
| Bug | Cyborg | Illuminate | ||
| 4 | Medium | 200 | 200 | 180 |
| 5 | Challenging | 225 | 225 | 200 |
| 6 | Very Challenging | 250 | 250 | 220 |
| 7 | Hard | 275 | 275 | 240 |
| 8 | Very Hard | 275 | 275 | 260 |
| 9 | Hard as Hell | 300 | 300 | 280 |
| 10 | Suicide Mission | 325 | 325 | 300 |
| 11 | Impossible | 350 | 350 | 350 |
| 12 | Helldive | 400 | 400 | 400 |
| 13 | An Exercise in Futility | 410 | 410 | 410 |
| 14 | The Definition of Insanity | ? | ? | ? |
| 15 | The Inner Circle of Hell | 450 | 450 | 450 |
Retaliatory Strike Hazards
The Retaliatory Strike arenas usually do not stand out, but a few of them are extremely dangerous, not only because they are filled with enemies - Arenas are arranged with hazards such as:
Gameplay Tips
- The AT-47 Anti-Tank Emplacement is very effective on the Retaliatory Strike mission-type, especially against Cyborgs or Bugs, and many players consider this Stratagem to be overly powerful against any enemy race. For new recruits especially, the AT-47 can turn a seemingly impossible endeavour into an easy experience. One or two emplacements defended and/or healed by other players with additional defensive items is a commonly found set-up for RS missions.
- Another effective tactic is to set up defenses such as Airdropped Anti-Personnel Mines or the A/AC-6 Tesla Tower in the center of the map. If (or rather when) the enemy swarms your position, reposition by skirting around the defenses (or by using a Jetpack to jump over them), escaping the enemy and simultaneously leading them back through the kill zone.
- The Airdropped Anti-Personnel Mines or/and A/AC-6 Tesla Tower is only effective against Bugs and Illuminates, bringing this loadout on the higher Cyborgs Retaliatory Strike missions is not recommended.
- It is recommended to bring the laser weapons instead, you will save one stratagem (Resupply) slot which will be very helpful to you and your team on the arena.
- Teamwork is especially required on Retaliatory Strike missions. Help your fellow Helldivers and match the loadout to theirs. (If your team is using ammo-hungry weapons and you will need more ammo, then take more resupply even at the cost of your 2 stratagems slots!)
- Retaliatory Strikes are quite small, but it doesn't mean to stay in one place. Movement is the most important part of survivability so keep moving.
Notes
- The Retaliatory Strikes frequency has been lowered to max one per planet and approximately one occurrence on every third planet in Patch 4.01.
- When playing solo in Retaliatory Strikes you will start with 2 Auto-Reinforces and a Shredder Missile Strike will clear the area when you respawn.
Gallery

0 enemies eliminated

57 enemies eliminated

246 enemies eliminated

300 enemies eliminated
376 enemies eliminated
504 enemies eliminated